Configuration
For uploading to the WiFire we'll be using MPIDE. MPIDE is based off the Arduino IDE and provides a simple way to program and upload code on a variety of platforms.
MPIDE can be downloaded from the chipKIT website here.
The modifications to MPIDE are designed for release 20140821. A list of releases can be found here if a newer update breaks compatibility.
MPIDE comes with the ability to program the WiFire, but in order to use the Flow libraries we need to add another board configuration.
If you have any problems along the way, either through following the steps in this blog or other issues, you can ask on the FlowCloud Developer Forums.
FlowCloud installation
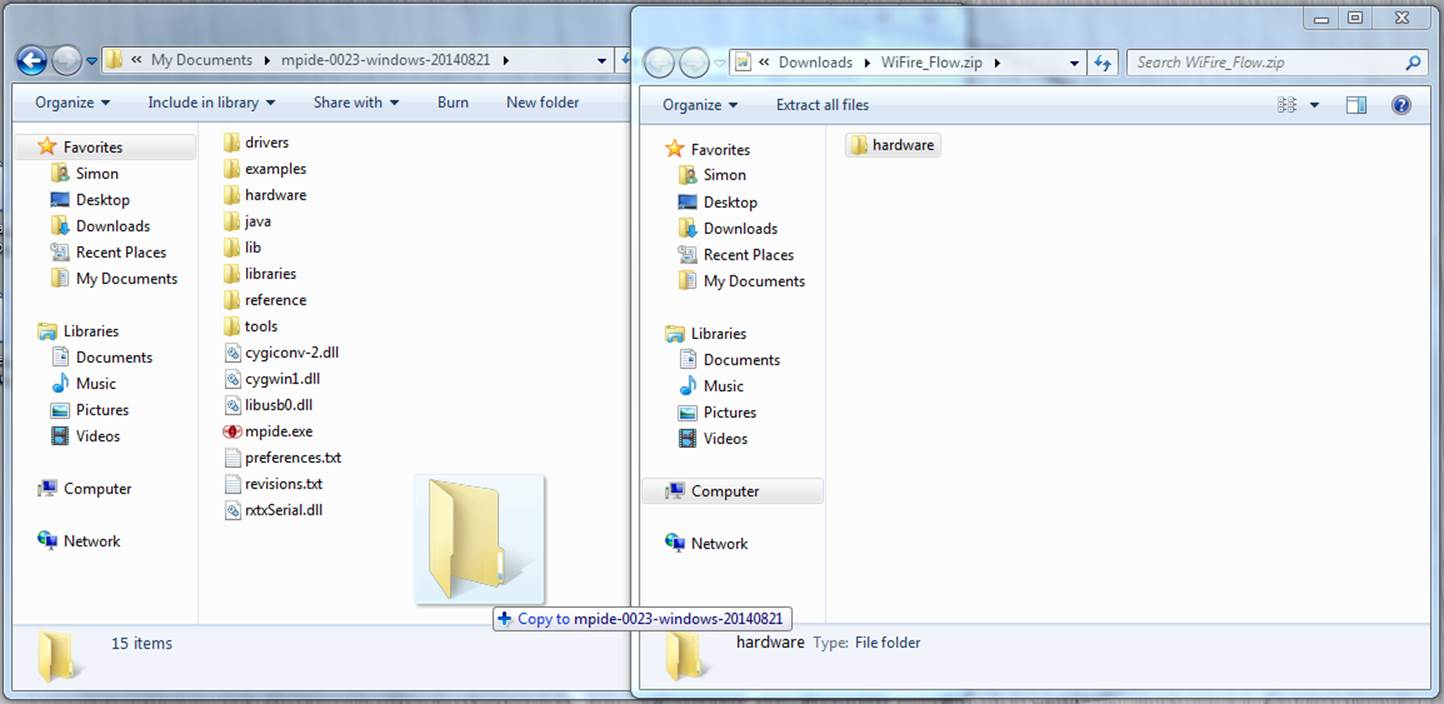
Simply go here and download the WiFire Arduino extensions then open it and drag the "hardware" folder into your mpide folder and confirm that you want to merge the folders, replacing all file conflicts.
Next you will need to compile the CyaSSL library, to do this follow the instructions under section 2.6 in the Developer Getting Started Guide here. The library will be located in the harmony directory under bin/third_party/libcyassl.X.a, copy this to hardware\pic32\variants\WiFire_Flow\libcyassl.X.a under the MPIDE directory.
Programming the WiFire
Now that you have installed FlowCloud into MPIDE you can upload a sample sketch to the WiFire.
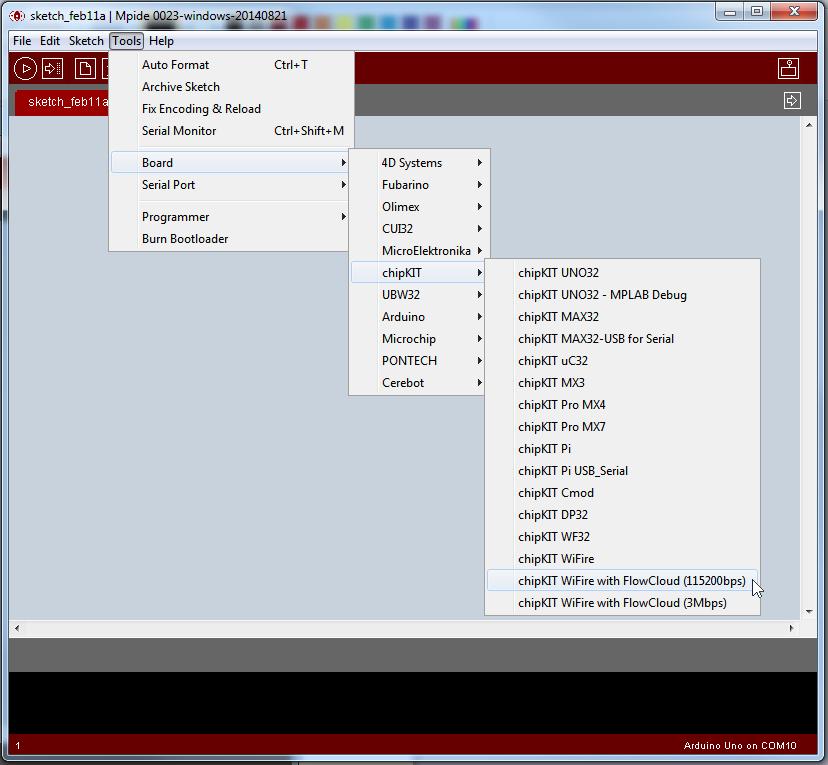
Open MPIDE and select "chipKIT WiFire with FlowCloud" as your selected board. If your board is from chipKIT directly and has the stock bootloader then you want to use the 115200bps variant. If you have a board with the FlowCloud bootloader (and starter app) or you have flashed the 3Mbps bootloader then choose the 3Mbps option.
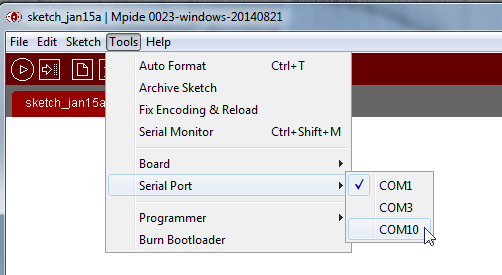
Next, plug in your WiFire and select the appropriate port to program it on.
On windows serial ports have the prefix COM but on linux they may look more like /dev/ttyACM<number> or /dev/ttyUSB<number>.
You can see what port your board is on by checking the menu before and after plugging in or by watching the "installing device drivers" dialog on windows.
On Linux you could also check the output of dmesg.
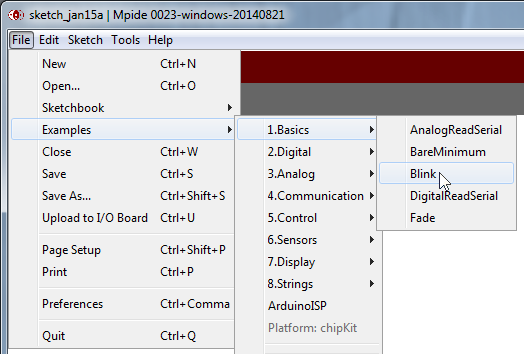
Now we need a program. The "Hello World" of the microcontroller world - a blinking light will do perfectly.
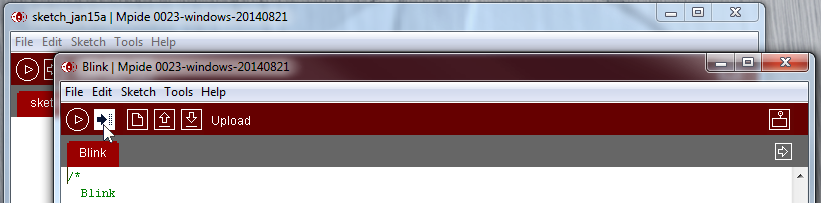
MPIDE comes with a variety of example sketches and we are going to use the "Blink" sketch.
Select this from from File > Examples > 1. Basics > Blink
Next, program this onto the WiFire. Make sure JP2 is connected, making sure that a jumper is connecting the two pins just below the reset button.
Now you can hit "Upload"
When this is done MPIDE should display the text "Done uploading" in the gray bar below the code. You are now ready to set up FlowCloud.
Configuring FlowCloud
Now it's time to configure the WiFire to connect to WiFi and to the cloud. We'll be using the Android or iOS app for this, but it it possible to configure without these.
For configuring using the console use this tutorial here.
Installing the App
First install the relevant App on your smartphone.
| Platform | App Store Link |
|---|---|
| Android | Google Play |
| iOS | App Store |
Registering a Device
Sign up or log in through the app and follow the tutorial for adding a device. Your WiFire should already be in configuration mode with LED1 flashing.
The password for the WiFi network that you need to connect to should be printed on the box if you got your WiFire with the FlowCloud starter app. If you don't have the password you can find it by opening the Serial Monitor from the top right of MPIDE and setting the baud (changed in the bottom right) to 115200. You should see a line beginning with Security Key: somewhere in the output. This tells the key you need to connect to the WiFire.
For a more detailed tutorial on how to use the configuration app check out the developer website.
Once everything is set up your code of flashing the LED should now be running. You won't be able to use the commands within the app yet, but we'll add those next.
Extras: Increasing the upload speed
If you are able to flash a new bootloader onto your WiFire, or want to change some driver settings to decrease the time it takes to program your WiFire take a look at the instructions here. This step is in no way essential so if you are unsure, don't worry.